Tuesday, May 28, 2013

Tortilla soup!

The first time the Hunky Dreamy and I made tortilla soup, it was pretty much because we were tired, poor, and really super hungry. I'm pretty sure our decision was also swayed by the likely fact that we had a bell pepper at the end of its usefulness as we both hate bell peppers but keep buying them with the hopes that we'll eventually find them useful. 

Now we buy peppers regularly and only sometimes let them go bad. 

Probably my favorite feature of this soup is that even if you have literally not a single ingredient of this soup, it'll max out somewhere around $15, and it will feed you and your loved ones FOR DAYS. That's just my kind of recipe. 

Tortilla soup stuff!

Large onion
Large bell pepper (or equivalent)
4 cloves garlic
2 jalapeños (optional.)
12oz. Diced green chiles
32oz. Crushed tomatoes
32oz. Broth
1c. Corn kernels
2tsp. Ground cumin
1tsp. Chili powder
1/2tsp. Salt
1tsp. Black pepper
Thyme and oregano (dried is fine!)
1c. Water


Optional toppings for finished soup:
Crushed tortilla chips
Shredded cheese
Diced avocado
Sour cream
Scallions
Luchadomo


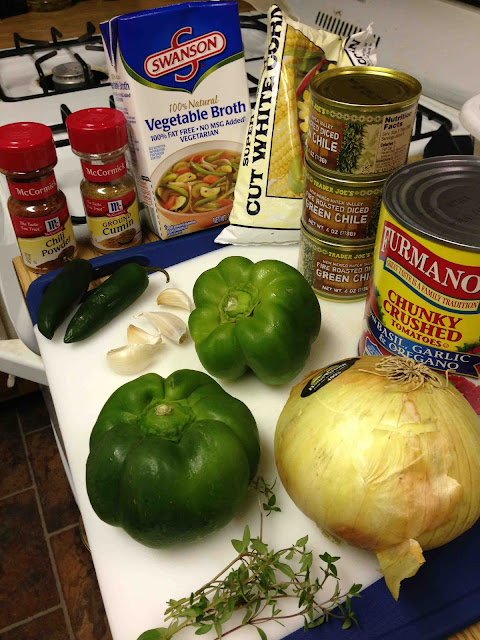
Chop up all your vegetables. CHOP THE JALAPEÑO LAST. ESPECIALLY AFTER THE ONION. If you ignore this advice, I promise you that you will regret it and NEVER EVER EVER EVER EVER forget the lesson you learn for the rest of your entire life. 

Grab a very large pot and coat the bottom of it with a generous amount of olive oil. Let it heat up on medium heat before chucking all your diced veggies in the pot. 


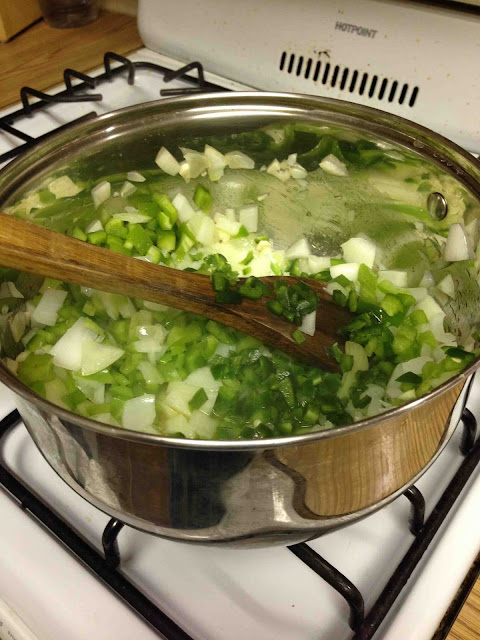
Throw in the cumin, chili powder, salt and pepper, thyme, and oregano while the vegetables are cooking down. Once they're all soft and easy to break apart with a spoon by just pushing on them, throw in your diced chiles, crushed tomatoes, broth, and water. 


Cover the pot at let it come to a boil. Once it does, add the corn and then continue to let simmer until the corn is nice and cooked. 


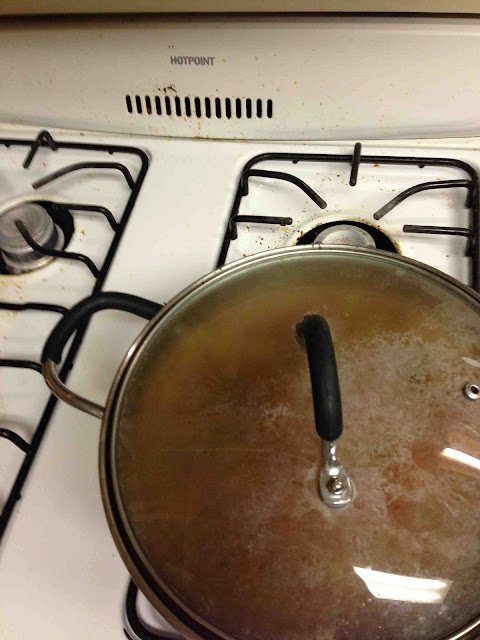
You're done! No blending, no straining some shit out or using an extra 400 bowls or crazy ingredients you've never heard of before. Just some cheap vegetables, one pot, and about 25 minutes. 


Most of the best part of tortilla soup is the toppings, and the only one I'd really push to say is mandatory is the crushed tortilla chips. Is the? Are the? Look, nobody's paying me to be the super most grammariest in all the land, so i'm just gonna go ahead and let you decide to overlook that. 

Anyway, avocado is really good in it, too. And cheese and sour cream if you roll that way. (I usually do.)

Enjoy, and May the Luchadomo always smile upon your soups. 
<3Kat. 


Sunday, May 12, 2013

Cherry limeade could bring world peace.


Cherry limeade is freakin awesome. 

In fact, cherry limeade is the reason this blog exists. Honestly. The first time Linny and I ever met, she said "hey, you want some cherry limeade?" To which I said "YES!" And we've been bestest friends and culinary geniuses ever since. 

Of course, the limeade she gave me was a powdered drink mix. This is precisely eight hundred billion zillion gillion times better and almost as easy to make, so you may want to consider treating yoself to a large glass of it during your mandatory BBQ this weekend. 

Here's what you're gonna need to get sippin on some awesome. 

30 cherries
7 limes
1 c. Sugar
1 c. Water
A lot of ice (or alot of ice for those hyperbole and a half fans out there.)

You will also need some sort of blending machine, and a medium-sized pot.


First thing's first...if your cherries have pits in 'em, get 'em out of there!


Roughly chop the cherries, and then put them in a medium-sized pot on the stove at medium-style heat. Throw in your sugar and water as well and let them boil together until the cherries are super soft. Of course, you're going to want to stir the pot because it seems like a sensible thing to do so, by all means...do. 

While that's happening, juice your limes in whatever fashion pleases you and set the juice aside. 

Protip: yelling at your limes to juice themselves does not appear to be an effective method. I will update you as the story develops, should they spontaneously evolve to more willingly accept my commands. 


Blend down the cherry stuff once the cherries are nice and soft and it's all started to foam a bit and the whole thing has really gone a lovely pinkish purple. 

Stir in the lime juice and cook on low heat for just a little bit to really persuade the cherries to accept their new lime overlords. 

To serve, fill a glass with ice and pour the cherry limeade concentrate over it while still slightly warm, causing the ice to melt in exactly the right way to water it down perfectly. Or, I guess, you could just add water until you think it tastes good and serve it over a regular amount of ice. Either way, this batch is going to make roughly 4 servings of cherry limeade. Enjoy them!


Party on Garth.
<3 Kat. 


Tuesday, May 7, 2013

That dip is dillicious!

Remember that mayo we made yesterday? Remember how I said it was essential? Yeah-it's an essential part of making this unbelievably delicious buttermilk...dill...sauce...thing. 

Look, I didn't have enough time to come up with a good name for it while I was shoving it in my face, okay? And trust me, you aren't going to much care once you've done the same, either. 

That awesome dill stuff

1 cup mayo
1/4 cup buttermilk
A good handful of fresh dill
A good handful of fresh chives
Fresh black pepper
Ground sea salt
2 or 3 cloves garlic (I recommend 2. 3 is pretty much my limit with this recipe since it's so powerful and you lose a bit of the dill if you use too much.)


Chop up your fresh herbs, and squeeze your garlic through a garlic press. Throw them in the bowl. Whisk in the mayo until its like the most herb-packed mayo ever. Then add the buttermilk. Add a good amount of salt and pepper until you particularly think it tastes delicious b


Bam. Dill stuff. 

So far, I've gotten great enjoyment out of using it as both a dip, and a reeeeeeeally awesome dressing for salads! 


Try to resist just guzzling it like a super weird beverage. 
<3 Kat. 

Mayo makes my arm hurt.

1,056 calories.

No, that's not how many calories you'd gain from eating a bowl of mayonnaise, it's how many you'd burn from MAKING one. It's a bastard of a thing to whisk up, but well worth just how much it's going to make you want to throw it against the wall and never talk to it again. 

Homemade mayo is one of those things that, in the end, is as essential as someone who loves you. Sure, you'll want to scream at it from time to time due to all the pain it puts you through, but in the end it's irreplaceable and appears out of nowhere to help make your life better. Kind of makes sense for Mother's Day in a weird, wobbly sort of way. 

Once you make your own, you'll never want to go back to buying the weird, mysterious chemical goop that passes for mayo on store shelves. 


Here's what you'll need to demystify mayo:

One egg yolk
Juice of one lemon
One cup of oil (dealer's choice.)
One teaspoon ground mustard
Light sprinkle of salt

Medium bowl
Whisk
Dispenser bottle (optional)


Pretty much, just remember this recipe by the fact that it is all ones. One yolk, one cup, one lemon, one teaspoon. Super simple. 


The first step to making mayo is about the only easy one to it. Put your egg, lemon juice, mustard, and salt in the bowl. 


Whisk them together until it's all foamy. Don't worry-the foam is how you know everything's properly integrated. 


If you have a dispenser bottle (and I really recommend that you use one), load up your cup of oil into that dream machine and get ready for the long battle ahead of you. 


This part is important.

Before you get all gung ho and start pouring that oil in there, you MUST know the basics of making a successful emulsion. 

The MOST important thing is start with one drop. One single drop. Why? Think of it like that one person you know that had to slowly wear on you. If they'd spent all day every day with you since the moment you met them, you'd probably just go right ahead and knock out all their teeth sometime around the third or fourth hour of them pronouncing your name wrong and rubbing the snot from their nose all over your newly upholstered furniture. But if they'd taken the time to introduce themselves slowly before asking you to let them move in, you wouldn't suddenly be looking for someone to front the bail incurred by your unexpected assault charges. 

You really need to romance the mayo. 

So, like I said...one single drop. And then a single drop more. And a single drop more. All the while, whisking like crazy and praying to the mighty mayo lord that all your efforts won't be in vain. 


Somewhere around the 30th drop, the foam will almost completely disappear. 


Around the 60th drop of oil, the foam should all be completely gone, and you should start to notice a slight glossiness every time you add a new drop. 


Right about the time you've gotten so tired and so pissed of and your arm is in so much pain that you no longer want to be attached to it...something interesting starts to happen. ...it starts to work! Despite all logic, adding a liquid to another liquid has suddenly started to thicken, and become closer to a solid!  

And it's about time, too, because this is the "throw the bowl against the wall" portion of the program I was talking about earlier. Good news! You are no longer restricted to single dots at a time! You may now incorporate two or three dots at a time!


And once it just very nearly starts to be able to make extremely soft peaks on it's own? You can very nearly add the oil in a light stream! Keep going! You're almost there!


Ah, sweet relief. When you hear that final, gasping wheeze of the bottle as it releases that last little ounce of that gorram oil...you're finally finished! Wipe the river of sweat from your brow and put this stuff to use!

Now of course, if you're a smart person and have $8, you'll save yourself all the misery and pain and just buy a basic electric hand mixer from your local big box store. But come on...how much more impressive is it to say you whisked up this mayo by hand?

See you tomorrow, you beefcake you. 
<3 Kat. 

Sunday, May 5, 2013

Pizza Friday!

My parents are terrible cooks. I mean seriously, senselessly terrible cooks. My mother created a terrifying meatloaf that may have been an original argument towards my vegetarianism, and my father lives almost entirely off of frozen chicken nuggets and disgusting hamburgers.

 I probably never would have tasted worthwhile food had it not been for my ex-almost-step-mother, who twice a week would make pasta sauce from scratch-the leftovers of which we would always use on scratch-made pizza every single Friday. She introduced me to the idea that all things worth having can be made yourself, and that fear is something never to be felt in the kitchen. I hope some day, if I ever end up growing up, I'm at least half as awesome as her. 

Even though our families eventually parted ways, mine never stopped making Friday night pizza. It's so ingrained in my being that I instinctively crave pizza on Fridays even if I forget what day it is. 

Today is Thursday. Sure, that means this is a day early, but it gives you plenty of time to prep. 


This is what tradition is made of:

2 c. Flour
2/3 c. Water
1 1/4 tsp active dry yeast
3 TBSP sugar
3 TBSP whatever oil you've got
1/2 tsp salt

Toppings:
Whatever the heck you want. 

(But I suggest basics like sauce, mozzarella, Parmesan, mushrooms, salt and pepper, dried oregano, a swirl of olive oil, and some crushed garlic.)


If you're using a bread machine, put everything in the bowl in the order it tells you to. Let it mix and rise, and skip the extra instructions that are about to be followed by those not lucky enough to have found one for $3 at a yard sale. 


If you're still waiting for the one you ordered off of Amazon to arrive, you're going to need to start with the yeast. 

Dump the yeast and sugar into the water, which you're going to want to make sure is warm. Mix it around and let it sit until it's all foamy while you combine the other ingredients in a massive bowl. When you're good and ready, put in the yeast sludge and mix it real well until it looks like...well...dough. You may need to lightly sprinkle on more flour, but be careful because if you add too much the final product will be tough and unsatisfying. 

You're going to knead the ever loving fuck out of the dough once it's combined and then cover it with a warm, wet cloth for about an hour and a half. 


Welcome back to the rest of the class!  Once your dough is good and risen, sprinkle your board lightly with flour and dump the dough on top. Then sprinkle the top of the dough with a wee bit more flour, separate it in half, and form the two blobs into balls. 

Grab a rolling pin and flatten a blob out into whatever thickness and shape you'd like. You're going to want to rub some flour onto the rolling pin, by the way. 

This is the part where everyone I ever teach to make pizza seems to become unsure of themselves. Honestly folks, there's not much to mess up here. It's already dough, all you need to do is flatten it enough to get the toppings you want onto it. And it's not like it matters if its a weird oval rather than a perfect circle if it tastes awesome. 

The best advice I can give is push the rolling pin into the center of the dough and roll from the center, outwards-constantly rotating as well as flipping the dough until you've decided you're finished with it. 


Preheat your oven to 400°F and slap your rolled-out dough onto a lightly floured tray, pan, or pizza stone before following the next step or you'll bugger up the whole operation. 

Put the toppings on in whatever order you want. I usually do mine upside down since sliding-off cheese is super lame. I'll usually put down the garlic, oil, "toppings", mozzarella, sauce blobs, dried spices, and shredded Parmesan in that order...but I highly recommend you do whatever you'd like in whatever order suits you. 

Bake at 400° for 17 minutes, or until the house smells unbearably of pizza and it looks as browned as you prefer it. 

DO NOT EAT THE PIZZA WHILE IT IS STILL LAVA. I know this last and final step is basically impossible to do, but trust me...if you succeed in this your enjoyment of the pie will be significantly increased as you'll not have burnt off all your taste buds and actually be able to sense the flavor of more than just the initial bite. 


Then again, that first bite is pretty well worth it. 


Enjoy the shit out of this, y'all. 
<3 Kat. 

Thursday, May 2, 2013

BANANANANANANANANANANA....bread.

It's kind of perfect that today, the day on which I'd intended to actually publish our first blog post, I was recruited by my lovely friend Marta to make a bazillionty banana bread muffins. She's running a charity 5k to help with an orphanage very close to her heart and was hoping we could bribe people to donate via the power of food.

In my experience, food is the best bribe in the world.

So rather than start you off on the badass journey of making fried pickles entirely from scratch (get pumped for next week!), I'll start this blog off with a journey based on love. Because while Linny and I are sure to rock your faces off on the regular with our culinary genius and complete and total shamelessness, we are both people who live to help those we love. I think it's important for us to start off making a good impression before we throw around enough curse words to make you doubt our sincerity.

Please, consider donating any amount to help my friends Brett and Marta Weber in their fight against world suck.
Donate to Marta
Donate to Brett


Banana Bread

3 c. flour
a couple dashes of salt
1.5 tsp baking powder
1.5 tsp baking soda
2 c. dark brown sugar
1/2 c. coconut oil
2 eggs
1 c. buttermilk (or 1 cup any milk mixed with juice from one lemon for that slight tang.)
6 or so ripe-to-very-ripe bananas

Optional-two dashes of cinnamon and a sparing dash of nutmeg. (I added them to the muffin version I made today and it was pretty freakin' awesome.)


Grab yourself a bigass bowl and two greased loaf pans while you preheat the oven to 300˚F.

Throw your bananas in the bowl and mash them with whatever you happen to have handy (I traditionally use my giraffe whisk because the whisk portion is great for both mashing and mixing, and the giraffe part IS A FREAKIN' GIRAFFE.)


Throw in the rest of the ingredients in whatever order you like. I've literally done it in every single order possible and even though you're supposed to mix the dry goods separate and slowly add them to the wet goods.... I don't bother. My method of cooking is pretty well described as PUT SOME STUFF IN A THING. COOK UNTIL IT'S FOOD. And as you can tell from all those capital letters, it does not involve much delicacy or give a damn at all.


Once the batter is all mixed up, separate it into the two loaf pans. If you're feeling crazy, mix in some chocolate chips and/or walnuts at some point before putting them in the oven. (I usually do it right in the loaf pan, but smart people will do it in the pre-panned batter.)


Cook for about 45 minutes to an hour at 300˚F for two loaves, or about 25-30 minutes at the same temp if you're using muffin pans instead.

Pro tip! If you tap the top of your bananananananess and it springs back up, it's done. If it indents, sticks to your finger, or feels all woobly inside... it's not done. It's also best to cool these on a drying rack, but since I don't own any I sometimes grab the grates from inside my toaster oven and use them.... Or just cool them in the pan. You should NOT cool things in the pan because they'll get soggy on the bottom, but to be fair... Banana bread is a sticky, semi-soggy treat anyway so most people won't notice for the couple of seconds it takes to shove these babies right on in their face.


See you, space cowboy!
<3 Kat.